As of Genesis 3.0.0, they’ve removed the “blog” template used in this tutorial, and we no longer support it. If you’d like to continue using the visual category index in Cravings Pro and Seasoned Pro, please upload a version of Genesis prior to 3.0.0.
For more details, please see the theme update philosophy.
Update: we recommend using the Feast Plugin’s Simple Category Index instead of using the difficult and time consuming method outlined here.
This section of the recipe index page is called the Visual Category Page Index in Cravings Pro and Seasoned Pro. Following are the steps to setup this feature on your own site.
IMPORTANT: Any page you create using this tutorial must be redirected to the category using Yoast or another plugin.
Note: This tutorial uses the classic editor, not the new block editor.

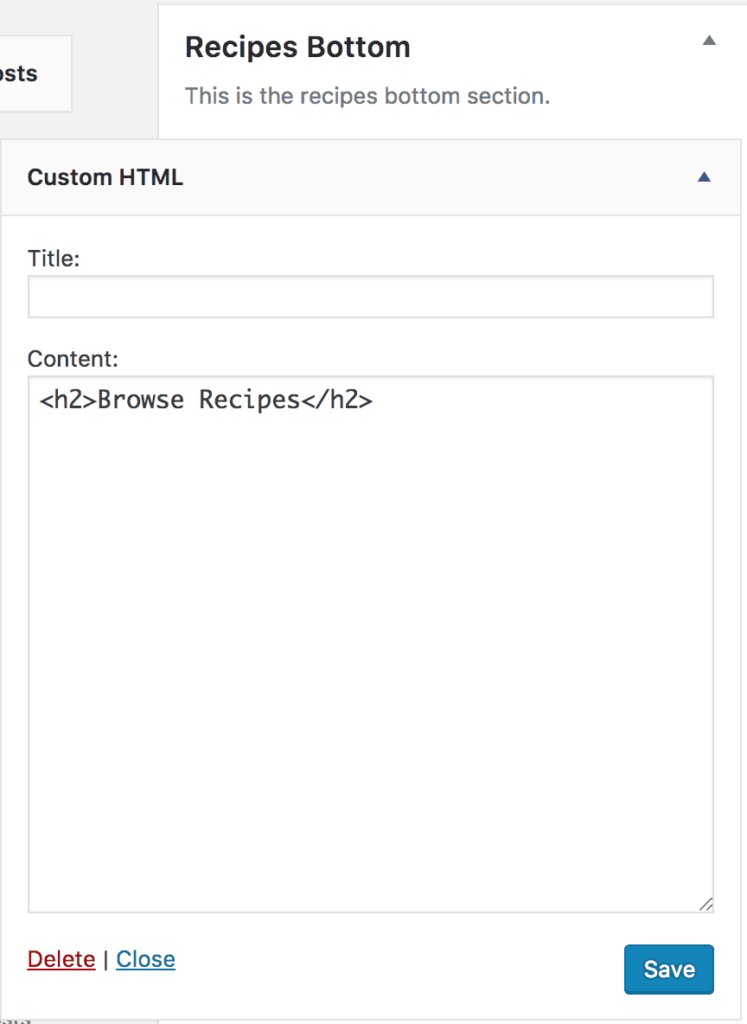
But first, if you would like a title on the page (like our “Browse Recipes”) then you can drag and drop a Custom HTML widget from the Available Widgets area to the “Recipe Index: Content” (formerly Recipes Bottom) widget area. Then, in that widget you can add in some HTML code and the title you’d like to appear here. This is how we’ve set that up on the demo site:

Next, to setup the visual category page index:
Create any categories you’d like to feature by navigating to Posts > Categories.
When you create the categories take a moment to make note of the category id as we’ll need to use this later in the visual index setup.
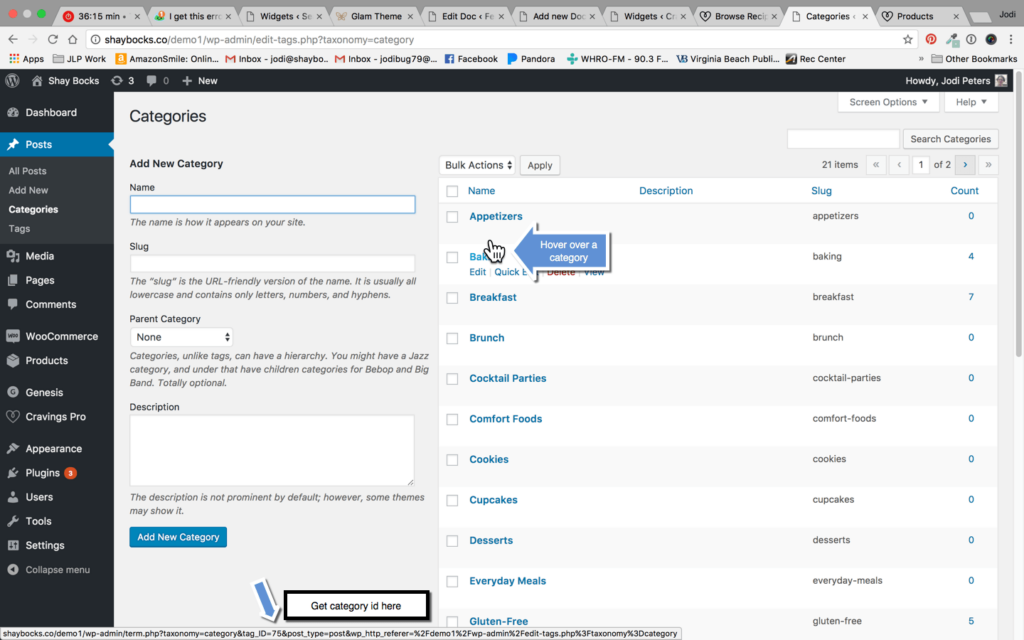
To find your category id navigate to Posts > Categories and hover over one of the categories. When you do this you’ll see a url pop up at the very bottom of the page. Your category id is contained here after the text “category&tag_id=.” On our site the category id for baking is 75.

Now you’ll want to create a new page for each category that you’d like to feature on the visual index. To create a new page you’ll navigate to Pages > Add New.
Give the page a title and then in the Page Attributes section assign the Blog template to the page.

We also recommend making this a child page of the page you created for your main recipe index page. This can also be handled in the Page Attributes section. On our demo site the page to which we’ve assigned the recipe index is called Browse Recipes. We’ve made Browse Recipes the Parent to this category page.

Next, you’ll want to add a featured image to the page.

The second-last step in creating the page is to add in the category id. To do this you’ll look for the Custom Fields section of the page editor, typically found below the post editor.
If you are NOT seeing the custom fields section, click the “Screen Options” tab at the top of the page you are creating/editing, and check the box for “custom fields“.
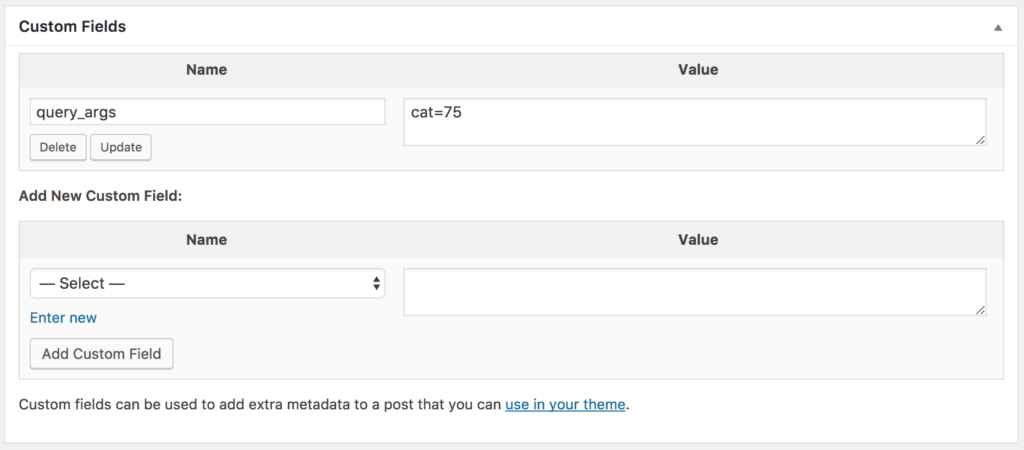
In this area you may already see a field for query_args. If not, you can use the dropdown menu to add a new custom field and select query_args. Then in the value box for the query_args setting put “cat=your category id number. ” Remember that in our example our category id for baking was 75 so our custom fields settings look like this:

The last step is to make sure this page is redirected to the category page using Yoast or another plugin. These pages are thin-content and are not meant to be show in the search engines.
Make sure that you select to publish or update your page to save it!
Repeat as Necessary
You’ll want to create all of your categories and corresponding pages before moving on to the next step.
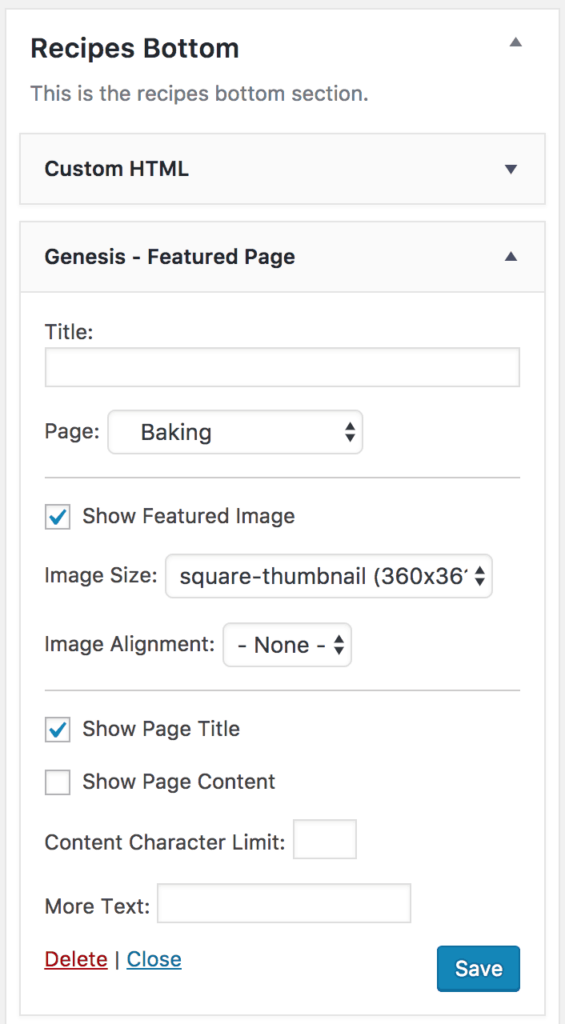
Now that we’ve created the categories, made note of the category id, and created the category pages it’s time to add that information the Recipes Bottom widget area. To do this navigate to Appearance > Widgets and drag and drop a “Genesis Featured Page” widget into the “Recipe Index: Content” (formerly Recipes Bottom) widget area (below the Custom HTML widget if you are using one). Then you can configure it as below making sure to select your own page:

You’ll want to add a Genesis Featured Page widget for each category page that you’d like to feature on the visual category page index.

