Always make sure you’re performing installations and updates on a staging site, not your live site.
This tutorial covers the following themes:
- Foodie Pro
- Brunch Pro
- Cook’d Pro
- Cravings Pro
- Seasoned Pro
Note: updating your theme requires a slightly different procedure than installing a new theme, see: how to update your food blog theme.

Important: you must have the Genesis Framework installed first before the Foodie Pro theme will work. However, do not activate Genesis before installing Foodie Pro.
If you already have the Genesis Framework please make sure that it is up to date before proceeding, this is necessary for our themes to run properly on your site.
Where to Find Updated Theme Files
Themes purchased on FeastDesignCo.com can be found by logging into your account and visiting the downloads page.
Install the parent theme
While following these steps, pay attention to step 4 and do not press activate.
- Go to Admin -> Appearance -> Themes and click on “Add New.”
- Click on “Upload Theme.”
- Click on “Choose File” and then select the genesis theme file (eg. genesis.2.09.0.zip) from your computer and click “Install Now.“
- When you see the message “Theme Installed Successfully”, do not click on “Activate”!

Install the child theme
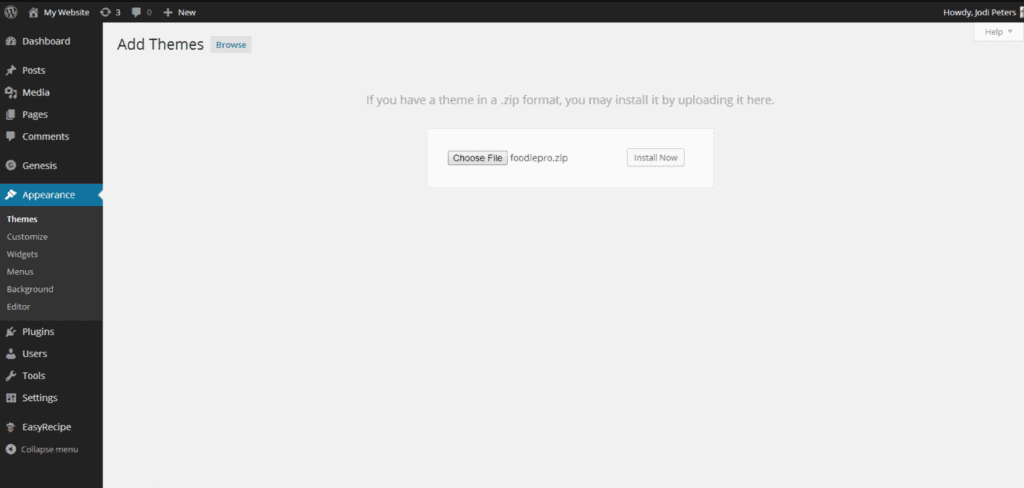
- Go to Admin -> Appearance -> Themes and click on “Add New.”
- Click on “Upload Theme.”
- Click on “Choose File” and then select the zipped theme file (eg. foodie-pro-v401.zip) from your computer and click “Install Now.“
- Note: if you can’t find a zip file after downloading, see below for no zip files
- When you see the message “Theme Installed Successfully” click on “Activate” and Foodie Pro is now your active theme!
Import the demo content
This step is only necessary if you are just starting out and do not have any content. Importing the demo content allows you the flexibility of knowing what your established site will look like as you decide how you’d like things configured.
If you already have an established WordPress site then you can skip this step and move on down to “Import the theme’s widgets.”

- From your dashboard navigate to Tools -> Import -> WordPress
- If you do not already have the WordPress Importer plugin installed, you will need to click “Install Now“. Please do so and then click “Run Importer“.
- Click “Browse” and then in your UNZIPPED theme file find the folder named “sample-data” and open it.
- Note: For brunchpro-v420.zip, it’s in the “xml” folder
- Select the XML Document named theme.xml (eg. foodiepro.xml) and then click on “upload file and import.”
- Choose to create a new user with the name “demo” so that you can easily identify and delete demo content later
- Then check the box next to “Download and import file attachments” and then click Submit.
- When you get the message “All done. Have fun!” then you are all set up with demo content to play around with.
- Deactivate and delete the WordPress Importer Plugin
This finishes the content import. Next, we import widgets separately.
Install and activate the plugins
The first step is to make sure that you have all of the necessary plugins. Before moving forward please install and activate the following plugins:
- Widget Importer and Exporter
- Genesis eNews Extended
- Simple Social Icons
- Yoast SEO Plugin
- ShortPixel image optimizer
- Regenerate Thumbnails
These are the bare bones plugins necessary to get all of the demo content to import.
Import the theme’s widgets
Following this step will save you a lot of time as you won’t have to arrange and configure every single widget or plugin for each widget area.

Pay careful attention to where you’re attempting to import the widgets.wie file – you need to use the “Widget Importer & Exporter” plugin, not the “WordPress Import” page.

Now, from your dashboard:
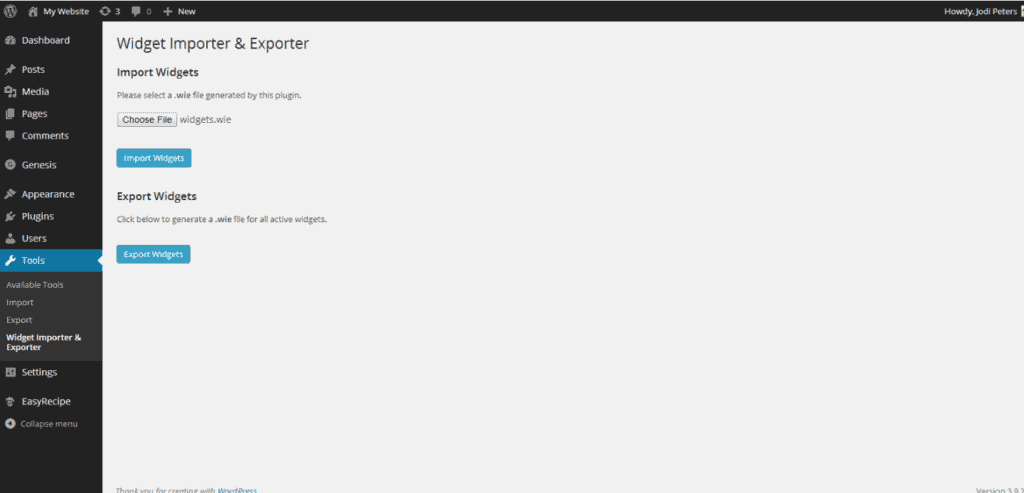
- Navigate to Tools -> Widget Importer and Exporter
- Note that this is not the same page as importing the demo content
- Click “Choose File” and then from your UNZIPPED theme folder, open the xml (or sample-data) folder and then select the .wie file (eg. foodieprowidgets.wie).
- Click “Import Widgets“
- Navigate to Appearance -> Widgets and update all of the widgets with your own information.
- Deactivate and delete the Widget Importer and Exporter
Upload your logo
We recommend using a logo image rather than displaying text – even if the logo is just an image of your site’s name.
See: how to set your logo
Troubleshooting
“Failed to import…” Errors
These are typically caused by not having the required plugins installed.
Multiple Copies of Widgets
This is caused by importing multiple times – each time an import is done, a copy of the widget is created. You’ll need to manually remove the duplicates, or start from scratch.
No zip files, only folders
We provide our theme in zip files. You need to upload the parent theme and child theme as zip files.
If you’re on a Mac that’s been configured to auto-extract zip files, you’ll need to turn this feature off, or re-zip the folder.
A Google search will teach you how to do this.
Finished
Now all of the widgets from the theme demo have been imported to your wordpress site and the fun begins! You can change the configurations to get your site to display as you want.
We recommend picking up the Feast Plugin to expand the functionality of your food blog, and configuring your blog for SEO.
Please note that sometimes during import some of the widget areas may become misconfigured. If this has happened to you, please see the tutorials provided for each specific widget area to get things re-configured.

